Sunday, January 29, 2012

Gap filling/ green stuff


Sometimes you will glue a model in place and realize there is a huge gap somewhere. This can easily be remedied with a hard drying modeling putty. There are many types out there but they are all essentially the same. One may sculpt easier or have a longer work time, but they are all similar in their properties. You can get "Green Stuff" from GW stores, or find other brands offered by online retailers. Privateer Press also makes a modeling putty. All products are basically a two part putty one side yellow, the other side blue that you mix together to get a green resin. It works the same as epoxy glue, one color is the resin the other color is the hardener. You can also use this product to sculpt your own miniatures or make new pieces on existing sculpts also known as converting. For now we will just focus on gap filling.

What you need:


Green Stuff: The stuff pictured is "Blue/ Yellow" by Kneadite. I bought this stuff because you get way more for fifteen dollars than you get at the GW stores. I ordered it online at miniwargaming.com
Modeling Knife: To cut the green stuff, and can also be used as a sculpting tool.
Paper Clip: For getting green stuff in smaller spaces, and sculpting.
Sculpting Tool: The one pictured it the one you can get from Games workshop. Privateer Press and Army Painter also make a set of sculpting tool. and of course you can use any art supply modeling tools for clay. I also sometimes use wood carving tools with greenstuff.
Water Color Chisel: These are rubber tipped paintbrushes you can buy from art stores. In the paintbrush area there should be a section for different types of brushes, acrylic, oil, and watercolor. In the watercolor section there should be different size, and shaped rubber tipped paintbrushes called chisels. You use these to push watercolors to make a thick textured line or to blend or erase the pigments left by watercolor paint. These work awesome for sculpting because it allows you to smoothly shape the green stuff, and prevent fingerprints from getting in your work. I started using these after I saw a video by Vanhammer73 on Youtube. Check him out he does great sculpt work. 
Non Stick Surface: I use a hand mirror I got from the dollar store. Anything that is flat, smooth and can get wet will work well.

Water: From the tap.


Getting Started:


Once you have the figure glued and it has dried completely you can start gap filling. I should mention as a side note that you can add a small ball of green stuff to the area you are about to glue together during the gluing process.When you press the piece into place the green stuff will ooze out of the seam and you can just clean it up around the seam. This will fill any gaps automatically and give you an even stronger bond than if yo had just used super glue.

Grab your green stuff and start mixing it up. A small amount will go a long way so try not to cut too much off the strip.

Put a little water on your fingers and on your work surface and start mixing the two parts together in your fingers. If it starts to get sticky while you are kneading it wet your fingers some more. Water is extremely important when working with green stuff, and you will use it throughout the whole sculpting process.


Once the two parts are mixed it will turn green, and you know it is ready when it's green all the way through, if you press it or pull it apart and you still see streaks of yellow or blue keep mixing it.


Now wet your surface and roll the greenstuff out into the shape of the gap you will be filling. The gap on the Necrotech is a line so I rolled it into a cylinder.
 

Next place the putty on the area to be filled and start pressing it in with a sculpting tool. I also use a paper clip for the smaller areas.


Once you have the gap filled you can go in and shape any areas that that need it with your water color chisel. this will ensure the area is smooth, and finger print free.


Now that it is all done let it dry for 6 - 12 hours, until it is hard. You are now ready to prime and paint the mini.

Saturday, January 21, 2012

Menoth Assembled/Army Painter


Finally got the Menoth assembled from the two player box set. The sculpts are pretty good quality and was easy to assemble. A few pieces needed to be filed down to fit properly but this is no different than any other model kit I have built. I haven't glued a whole lot down yet, I just pinned the pieces into place in the position I wanted them. I did this because a few of the areas would be hard to access later on with a paintbrush, and during the priming process. I glued down all the pieces that are "open", and then primed the extra pieces separately and once the body and bits are painted I will glue it all together. Here are each of the units built to be primed.

Kreoss:


Crusader & Vanquisher:


Cinerators:


There is also a Repenter that you can see in the following picture as well, for Some reason I didn't take a picture of it before it was primed. I used "Army Painter: Matte White" primer for the first time, and I am very happy with the result. It came out thin from the can and evenly spread over the minis. It also comes in tons of colors, and for the price I will no longer be using GW primers. Here are the minis all primed up, I wont be painting them until I get the paint I need, or can figure out a GW equivalent for paint colors. I saw a few lists online that list the colors, so we'll see.


Next Up: Gap Filling.

Thursday, January 12, 2012

Unboxing 3/Figure Cases

I got my boxing day order today! I figured I would just get all the stuff I would have bought throughout the year while it was 20% off, and I still had holiday money left over so why not. I will go over all this stuff later when I get to assembling them and painting them, but for now it is pretty much everything for the 35pt point Skaare build I had been play testing lately.


Top left to bottom right: Leviathan Hell Jack, Bane Knights unit, Satyxis Raiders Unit, Bane Lord Tartarus solo, Bane Knight Blister x2, Satyxis Raiders Blister x2, Reaper Hell Jack, Gen.Gerlak Slaughterborn solo,and Pirate Queen Skaare. 25 models total.


I ordered the "Cryx" foam kit offered by "Battle Foam" for the figures case I got for Christmas, which I will go over in a moment. It will hold my Cryx and Menoth models. I also thought I would try out a different type of primer, I have heard good things about "Army Painter" colored primers online, and if I like it I will probably stick with it abandoning the primers from GW. The primer was $10 dollars less than a can from GW so I hope it works out. $10 dollars can get you another Warmachine model. Also grabbed a variety pack of Magnets for the forest terrain I have been working on.


Figure Cases: Battlefoam Warmachine Figure Case.

I had been using some makeshift, and cheaper alternatives to army transport over the years and didn't really have a need for anything crazy or fancy. But lately I find myself trucking my armies all over the place rather than always playing in one centralized location. I needed something that would hold up well in travel and I wouldn't have to fuss over my models falling or banging together chipping the paint, especially with the metal models that are abundant in Warmachine.


There are many ways to go about carrying or storing your models. This can range from putting them in a cardboard box with paper or foam, buying seat cushion foam and cutting it out yourself to be placed in a tool box, wrapping your models with bubble wrap and placing them in a Rubbermaid storage container. Or any other suitable thing you can come up with. I always went for the cheapest thing that I thought would work for a particular army.

Awhile back I got a "KR Multi Case" which served it's purpose and will continue to do so for some of my other models. My army quickly outgrew it, but for under 35 dollars it was worth it. I needed something cheap to protect my metal army. Metal models chip very easily, and I was stressing out too much taking them out of the house. the KR will hold 72 figures roughly, and has a pluck foam layer on the bottom for custom sizes.


For my plastic Space Marine army I don't have to worry so much about the paint chipping because they are lighter than the metal models, but I still have to be careful not to let them move around too much. Right now I have them in a bead craft case from Walmart, you can also buy them at Michael's. It holds close to 4000 points worth of space marines and for 30 dollars you can't complain!


As you can see the top will hold 1 Land Raider, 2 Predators, and 2 Dreadnaughts.


The front folds down giving you three compartment trays, I use the bigger one on the bottom for bits, magnets, green stuff, model bases, etc. This Space it creates will hold 1-4 standard Dreadnaught's, 3 transports, or Whirlwind if you can remove the missile pods, and of course any combo as shown above.


The compartment trays are customizable and fit standard squads, Teminators, Assault Troops, and some characters. Like I said these were working fine for me when we played mainly at my house, but other friends have ventured into table building, and I sometimes attend a group of local players for friendly games so I wanted something that could really protect my models I work so hard on painting. After doing some research and price comparisons I went for the Privateer Press sponsored Warmachine bag from Battle Foam. I had heard great things about the bags in the past and I like the laser etched custom tray option for a snugger fit. I know my models won't go anywhere if the bag falls over.


It will hold 13 inches of foam with tray area dimensions of 15.5W x 8.5L" (394W x 216L mm), Bag Dimensions - 17W x 11L x 14H" (432W x 279L x 356H mm). The KR foam is one line too wide. Bag and foam sold together or separately.


Where the Warmachine logo is a flap lifts up and there is a space for your standard sized rulebooks, as well as pockets for tokens, keys, wallet, whatever. Inside on the same wall is another slot for an army book that rests outside the foam stack.


On the side there is a pocket that perfectly holds the small rulebook that comes in the two player box set, as well as the templates and dice needed to play.


The back has the Battlefoam logo and unzips to reveal...


An area for cards, tokens, markers, and a three ring coil so you can add card sleeve sheets. I  managed to separate all the cards for the models I have and put them in individual sleeves. The three ring binder coil is big enough for me to add two complete card sets for Cryx and Menoth in card sleeve sheets and still have room for paper, or other cards.
On the other side there is a drink holder which now holds a measuring tape.


And this is how you get the foam out. It completely folds around the foam secured with two zipper heads so the bag can be locked. It's a little on the pricey side, but it is definitely worth every penny! Retails for $154 with foam. I really like how it keeps all the components and accessories together in one place and seems to have the gamer in mind in terms of design. Warmachine requires more things to play than Warhammer, and trying to travel with it all in different places can be a pain.

Not really sure what my next post will be about, I have so much new stuff to tackle I don't know where I'm gonna start. Well see. Happy gaming!

Tuesday, January 3, 2012

Forest Terrain Part 2

Now we're going to move onto the finishing details and adding foliage to the trees. I made a few tall grass outcroppings by just putting a little hobby tac on the bottom of some field grass by Woodland Scenics. I'll be placing them to the outside edge of the piece.


I then got three tupperware containers and put in three different colors of green clump foliage, I then added the appropriate highlight colors of bushes to the foliage. There are two ways about going about attaching the foliage to the trees. The first is to cover your armature with hobby tack and once it is dry you can start dunking it in each color turning the tree around as you go. This works great if you are pressed for time or only using one or two colors of foliage. Here I am using six so this method looked unnatural.


So I used the second method, which is to apply the hobby tack to the armatures (pictured below) and once it is dry, start with the darkest color of foliage and starting from the inside of the branches (closest to the trunk) pressing it down one clump at a time by hand. When applying the hobby tack try to leave a few gaps on each branch so it will show through the foliage. Then move onto the medium green color and start applying this the same way to the middle of the branches. Finally use the lightest green foliage on the tips and into the top of the branches.


One thing I have found with "hobb-e-tac" from woodland scenics is that it is indeed very tacky, but the bushes don't really stick firmly to it. I had some fall off as it was sitting and had to re press some areas that wouldn't hold. I imagine I will have to do this every time the terrain piece gets used, but it isn't too hard to deal with. Another thing is, DO NOT follow the directions on the back when it comes to applying scenic cement to the foliage you attach to the trees. I did this thinking it would give the piece better hold. What ended up happening instead, the scenic cement liquid dissolved the hobb-e-tac, and all the foliage I had just stuck on started falling off the tree in huge clumps.

I ended up taking it all off and putting it in a tupperware container, keeping the foliage somewhat separated and let it dry up over night, I then used the first technique to save time. Now when you look at the piece the tree on the far right looks weird compared to the first two from the left. This will give you a visual reference to my example above. This is the first time I have used hobb-e-tac and there was a little bit of a learning curve. I'll probably go in later and fix that tree on the far right when I do the other ones. I plan on making 4 separate forest pieces in general, I'm just waiting to get some magnets to finish them off.


                                        *         *        *        *       *       *       *       *

*EDIT* After just finishing the trees on a second piece, I ended up using two glues trying to give the clump foliage better holding power, and it worked out way better than the first time. What I did was apply the hobb-e-tac like I did above and once it was dry I went back over the ends of the branches with a spray adhesive called "Super 77" by 3M.


This in conjunction with the hobb-e-tac really bonds all the foliage to the branches perfectly. I was spinning it by the trunk, back and forth between my fingers, and very little foliage came off.
                                                
                                        *       *        *        *        *        *        *       *


Here's how it turned out


I didn't get a chance to get a picture with the rocks painted or the tall grass added yet but I'll put up some pics when all four pieces are done. Next up I suppose I will do a product review of a few things I got for the holidays, and hopefully have some pics of the finished slayer. Happy gaming!

Monday, January 2, 2012

Forest Terrain Part 1

This is my first entry for terrain, and I was going to talk about materials in depth like I did for the "Painting Basics" tutorial, but I quickly realized there is way more, in terms of materials, that go into constructing terrain for our tabletop games. To get it all out, take photos of it all and post hundreds of useless photos with a blurb would be, well, grueling for the reader and me. So instead I decided to just build a piece and talk about what I use for each type of piece, and how I go about building it. 

There are many things to consider when making terrain but the most important is cost management. You can make amazing terrain pieces on little to no money, and you don't have to go out and spend hundreds of dollars on materials, the bigger the piece the cheaper it should be to construct. This should be the golden rule. I use a lot of Woodland Scenics products, and I have built up a collection of practical things to build terrain over the years. Lately I have been sticking to the same materials religiously, due to their low cost and overall aesthetic. The second rule is to always consider how your models are going to interact with a piece before you build it. Simple is often better and less is always more.

Forest Terrain Piece:

Materials Used:

For the trees and bushes I'm using Woodland Scenics tree armatures, clump foliage, and bushes, different color grades from light to dark. I'm going to be magnetizing the trees, which is something you should consider for storage and game purposes if that option is available to you. You can find tons of magnets online!


Glue, static grass from GW, glade, scorched, and dead grass. I cut out some irregular shapes of mdf board for the bases and contoured the edges with a carpenters knife.


Colored Flock, and different grades of "Talus" by Woodland.


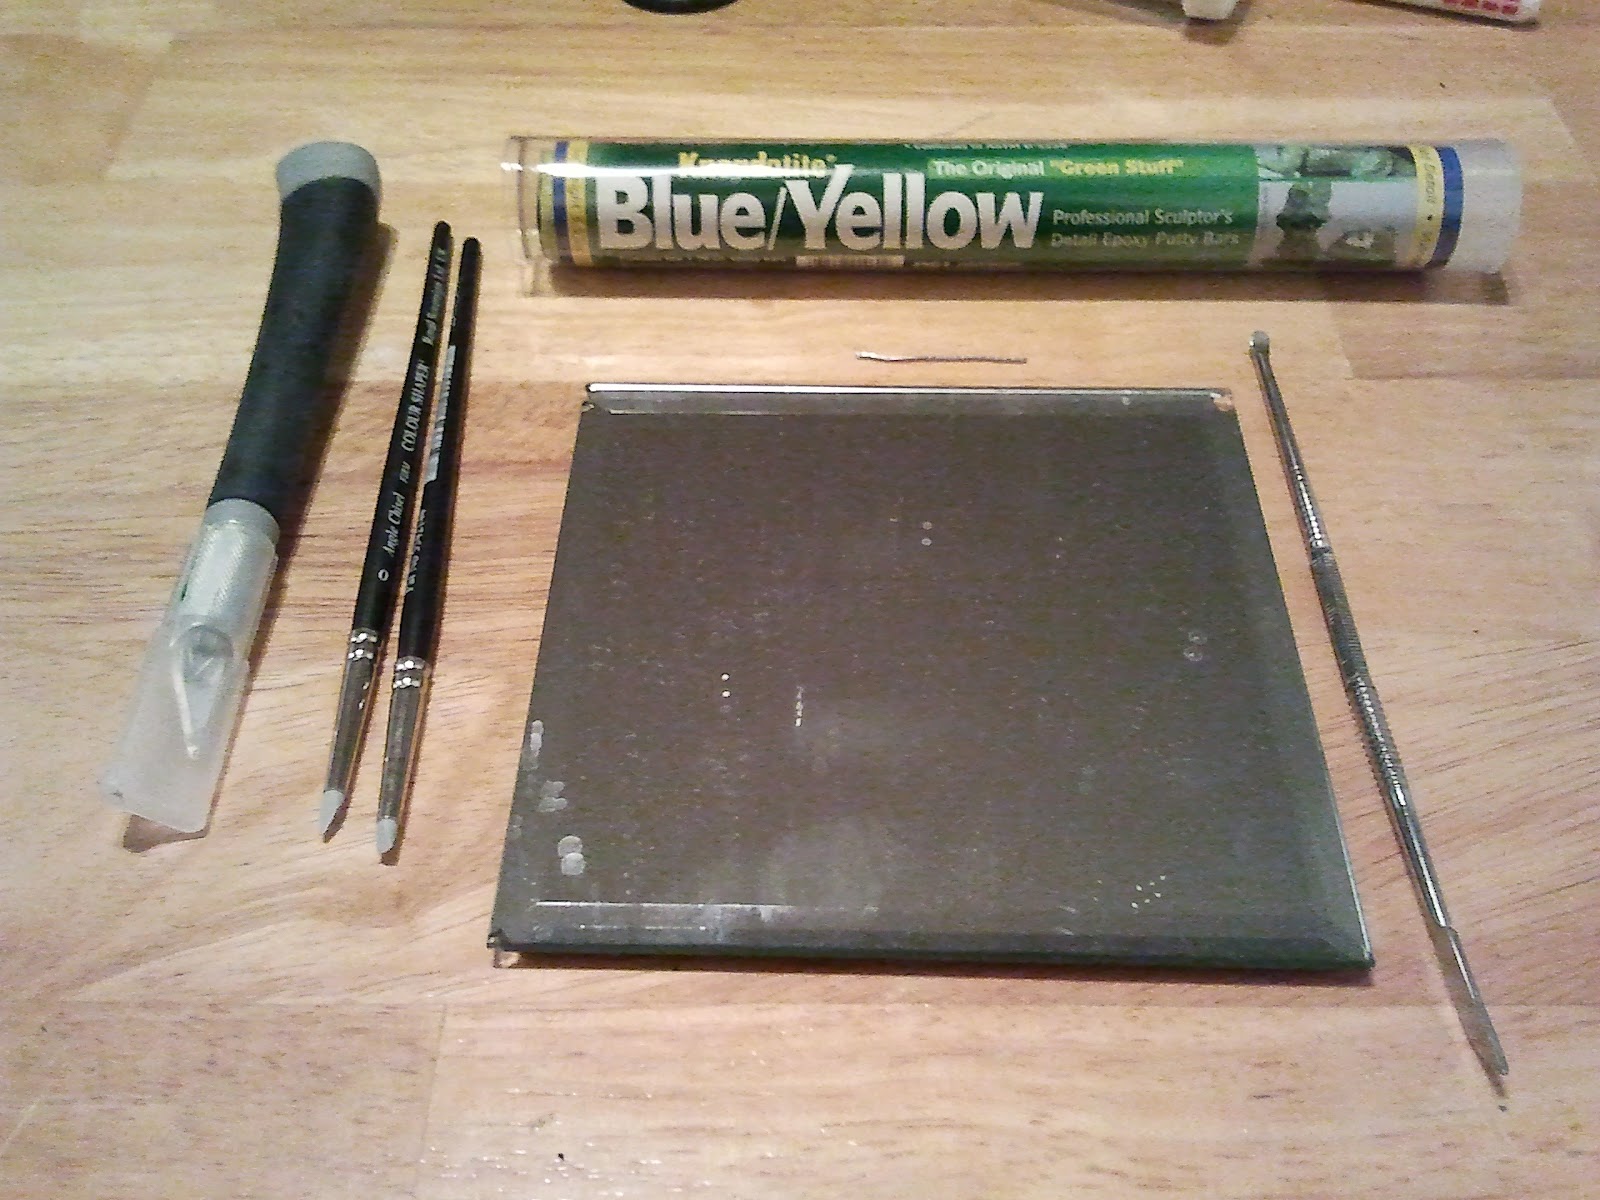
Dark Green, and Dark brown craft paint, modeling paste for gap filling or making contoured ground, paint brush, make-up sponge, old cork scraps from making scenic bases, and some sticks from outside.

Construction:
First things first, I painted the wood bases green, and while the paint was still wet I blended in dark brown into the center. This way if the flock we apply later comes off it will look like dirt underneath. When making terrain it is important to use the cheapest paint you can find that is acrylic based. "Tole" or "Craft" paint I find an economic solution seeing how you can get it at the dollar store. DO NOT use your expensive modeling paints to paint terrain, use it only on any detail features or for highlighting.


Once that has dried bend the tree armatures into shape and place them on the base to try and figure out where they can comfortably fit, so they wont be touching once the bushes are glued on, and that they will provide enough coverage for line of sight.
 

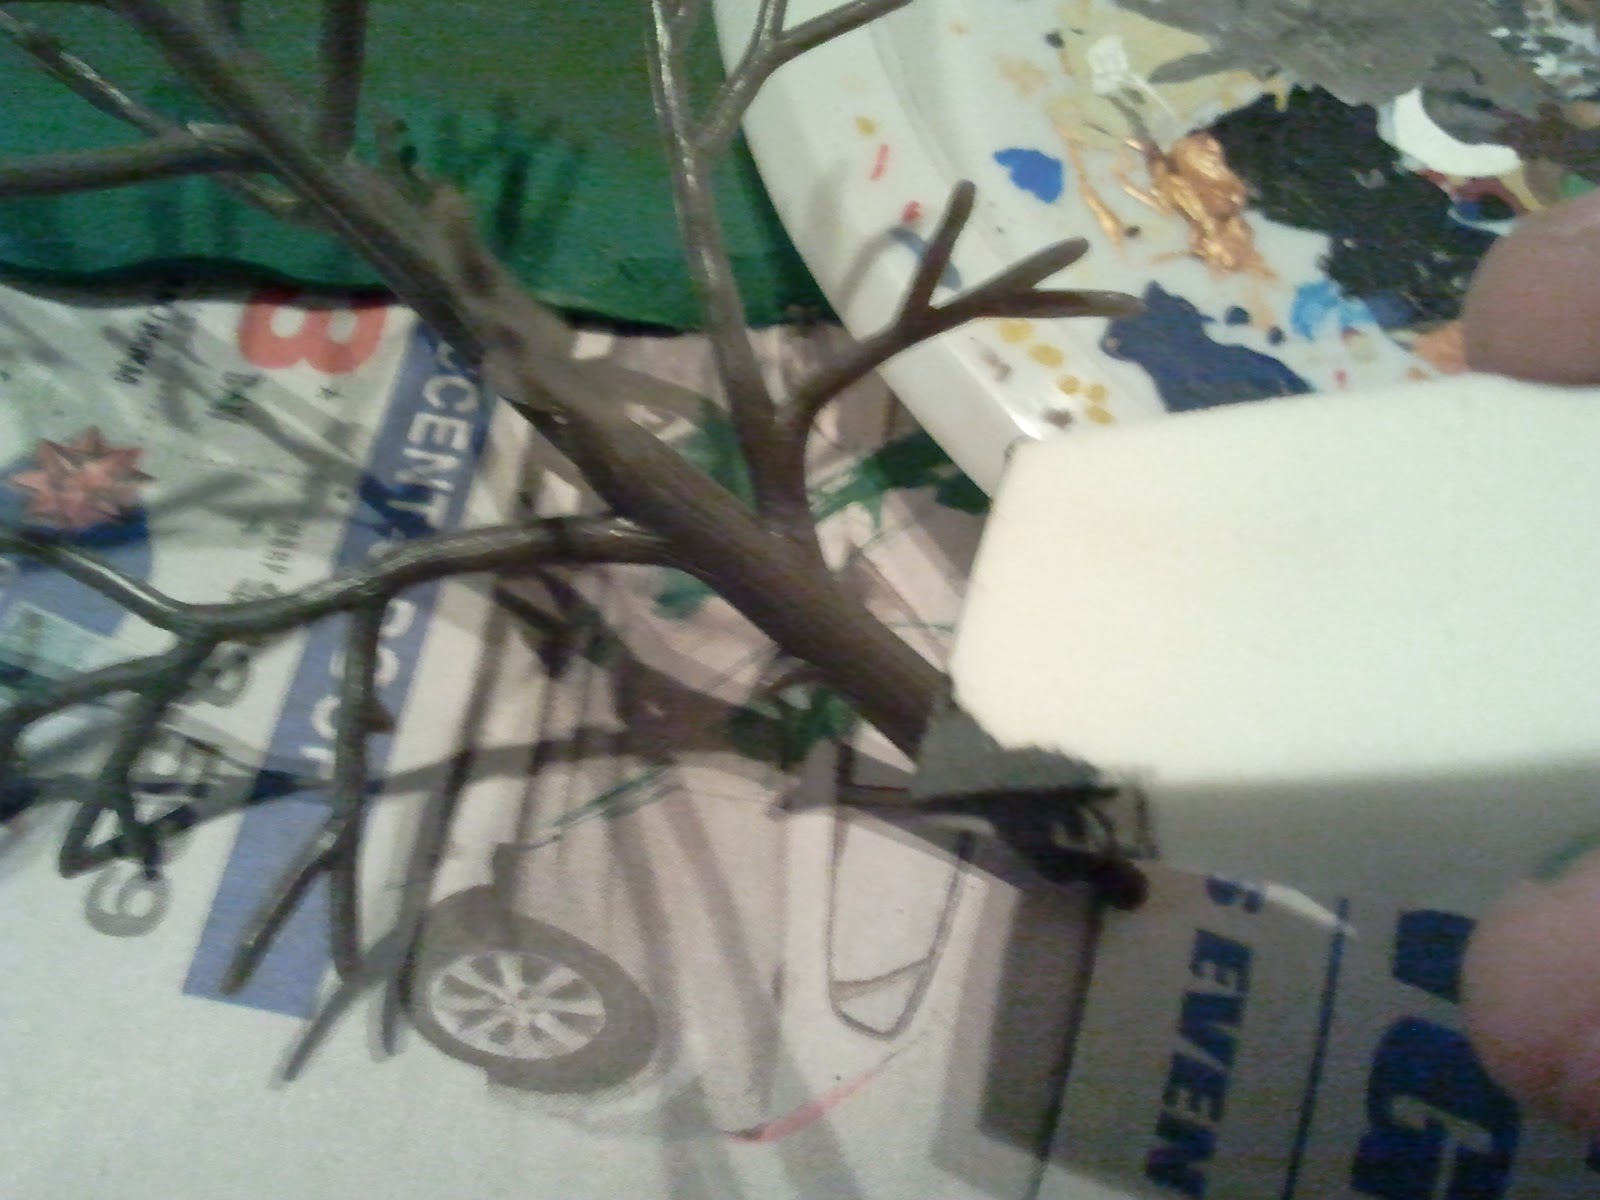
Now onto detailing the trees. If you look at a branch on a tree it isn't just one color for the bark. A seemingly brown trunk could be full of greens and grays once you get closer. I gathered some branches outside after a wind storm, and decided I would try to model my trees off of them to keep the piece uniform.


To mimic this I used a make-up sponge, "Adeptus Battlegrey" foundation paintand "Codex Grey" by GW, as well as "Cryx Bane Highlight" to test out the colors I had just bought, you could use "Fortress Grey" as a substitute.

 Start with Adeptus Battlegrey and put some pint on the edge of the make-up sponge.


Dab the paint on randomly but evenly up the trunk and along the branches. When you move up to the next shade of Grey try and dab it next to the first darker layer you just put down staggered from that first line. Next use a thin brush to paint the brightest Grey in a thin horizontal  line in a few random areas all the way up the thrunk of the tree and at the tips and along the top of the branches. This will make the branches look pretty bright, but it will darken up and look natural once the bushes are glued on. Once they are painted they should look like this.


Mapping:

It is important to map out each terrain piece before you start building to ensure it will actually be useful in you games. It can look as crazy as you want but if it doesn't work in the game it is a useless piece of shit unless you need something impassible, and always impassible. To do this place a ten man squad inside the terrain base so they comfortably fit, and then start placing your terrain details around them.


Once you have it all mapped out you can glue down the bases that the trees slot into. *IMPORTANT* If you do not plan on magnetizing the trees and just want to slot them into the holes provided, do not use super glue to attach the tree bases to the terrain base. Glue will sometimes fill up the holes in the tree bases, and will make it impossible to fix if it is super glue. Super glue will melt the plastic and the tree will never slot in properly again , use hot glue or white glue instead.  Also do not attach the trees to their bases until the glue is dry, it will either glue the tree in place or damage the peg at the bottom. If you are going to magnetize it I would suggest using super glue so the strength of the magnets don't pull the tree bases from the terrain base.

You can also go ahead and attach any cork rocks on the edge of the terrain base, talus rocks, or stick dead fall now with a hot glue gun. I like to use hot glue for this so it is somewhat elevated above the static grass.  I also glued a few lines of hot glue onto the tree bases to simulate roots, modeling paste would have been better I think. I used "Hobby-Tac" around the edges of the terrain base and let it dry for 15 minutes. I then attached different colors and grades of clump foliage to the outer edge of the terrain piece.I left some areas open to simulate path entrances, and to make it look less uniform. In game terms it doesn't really matter how high the bushes and stuff are because once a model is in the terrain feature it gets any bonuses that terrain incurs.


I notices that there was some empty space on one side so I decided put an arid patch of earth to fill the space, and to save on static grass later on. It also happened to be in a place where if the sun were shining it would regularly hit that area so i figured it wouldn't look out of place.


For this patch I mixed up a batch of the two finest grades of talus, mixed with dark soil flock from Woodland Scenics. Once I glued it down with white glue I sprinkled a lighter dirt flock over the top. Once it was dry I went over it all with and eyedropper and scenic cement to blend and stick it all together. I also piled some up around the outside edge of the cork rocks.

Static Grass:

I use GW static grass because I prefer the material it is made out of compared to other companies that make it, this is a personal preference and I would recommend using something cheaper if you don't mind the effect it gives. I also use a pair of hooked nose tweezers to painstakingly apply the static grass one pinch at a time. This may sound crazy, and it is, but I like having complete control over how much is being used, how dense it is, and how it stands in the glue. I also find I waste a lot less, and at the price, I cant afford to waste. You could just cover the whole area with white glue and sprinkle static grass all over the piece and shake off the excess once the glue dries. It is up to you.


Paint glue down to a small area with an old paintbrush and then apply the static grass to that area. I used the bright glade grass on the areas where light would always shine if the sun was above the terrain piece. I used scorched grass on the areas around the base of the trees to simulate the shaded areas, and I used dead grass on the dirt patch, and along some of the cork tile rocks.


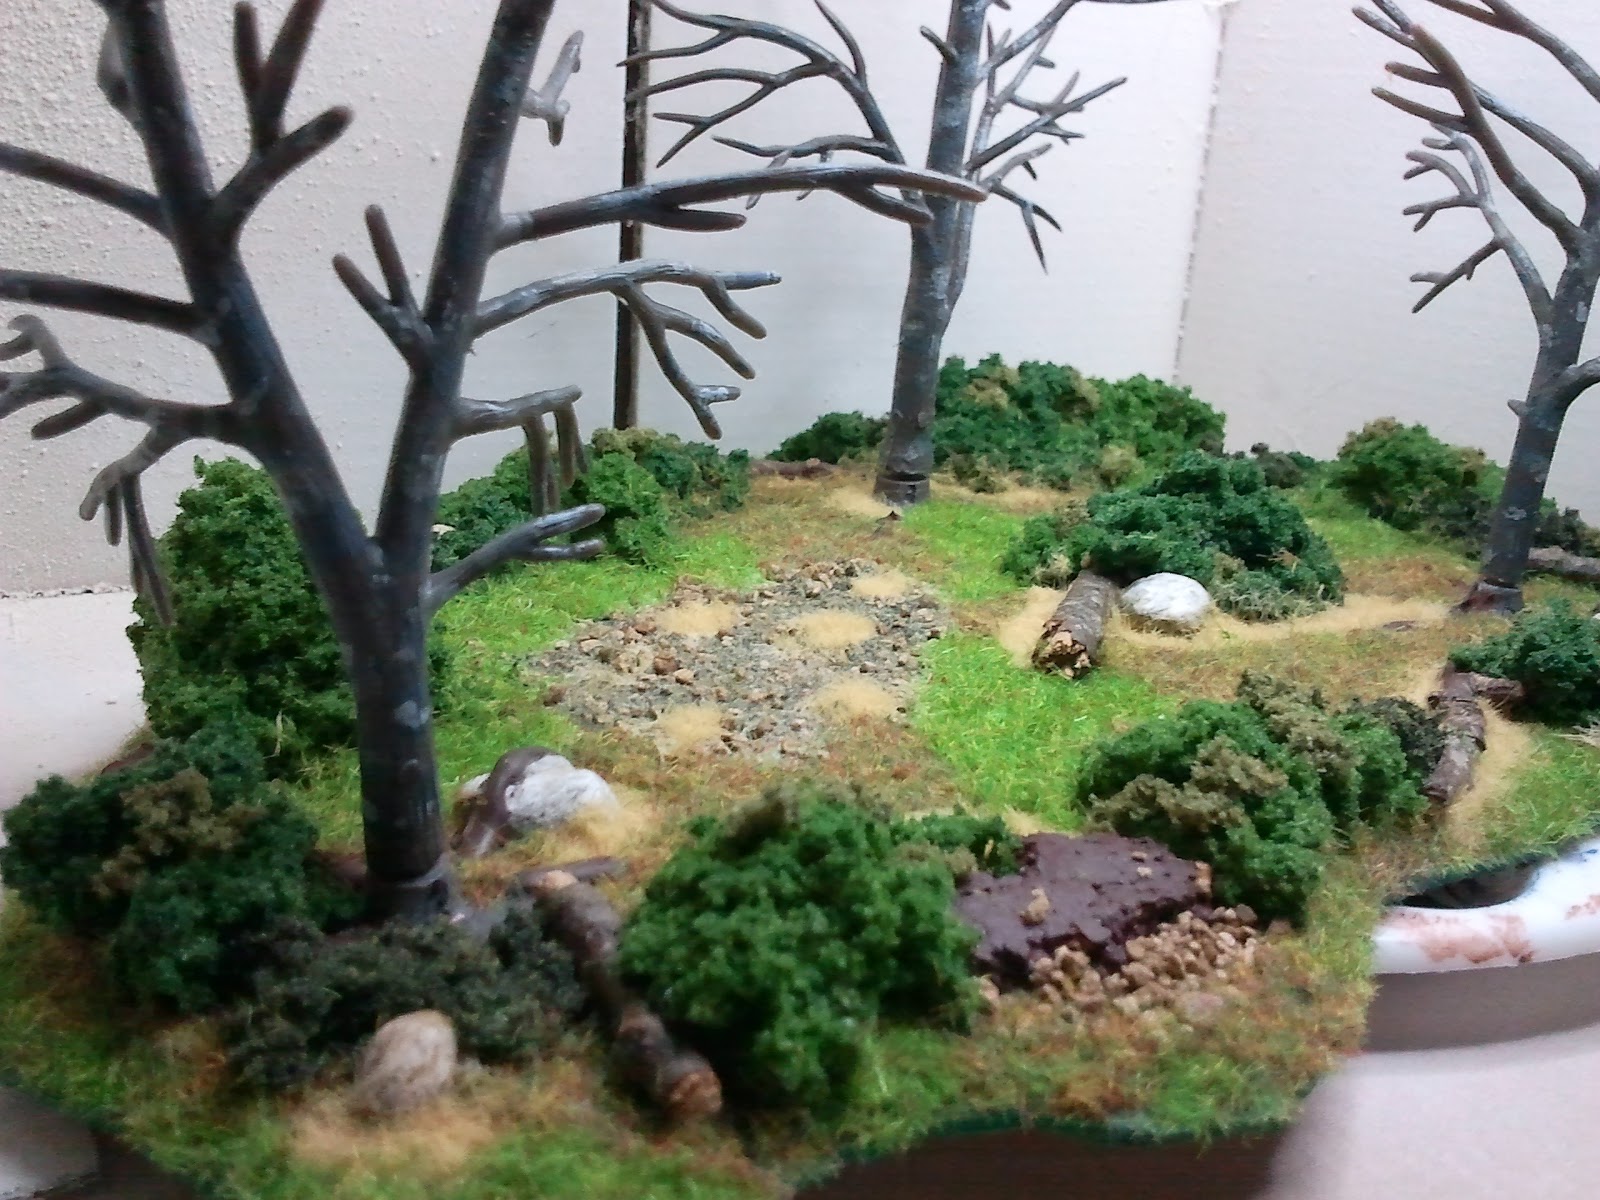
Once it was finished it looked something like this. (Time 1 hour).


Next up: I'll go through attaching the foliage to the trees, and finishing it up.